
How to Lay a Gravel Path in a French Garden
Why Gravel Suits a French Garden
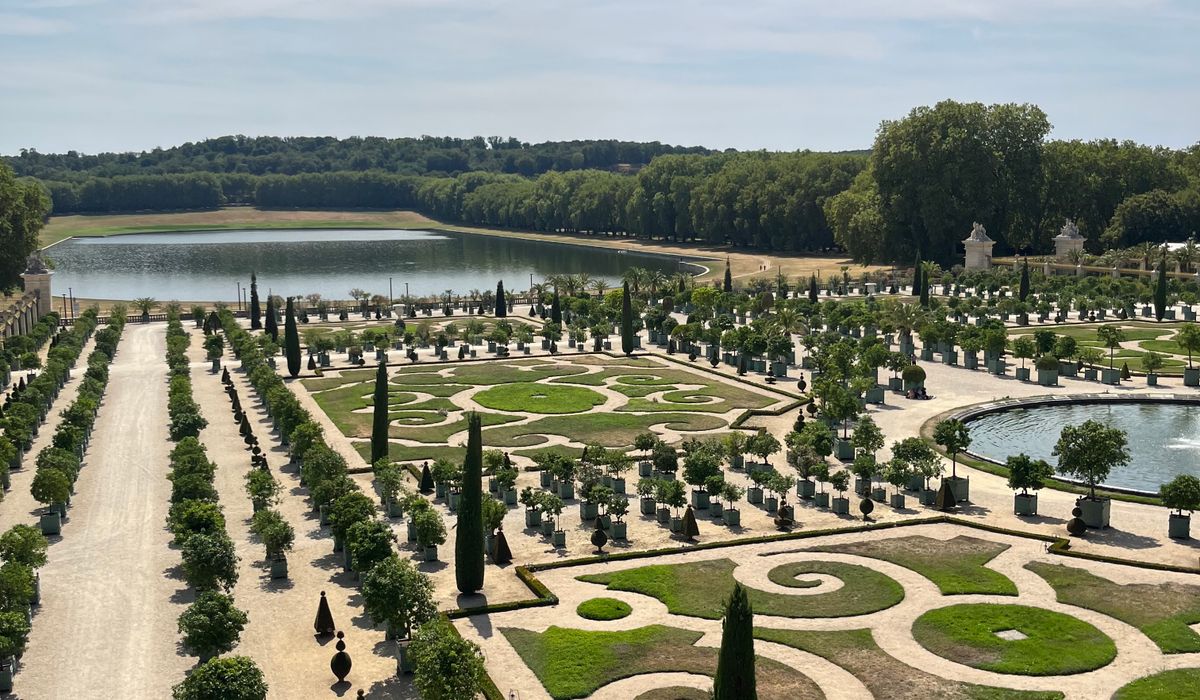
Walk through almost any classic French garden and you will find the same quiet hero underfoot: pale, rounded gravel. At Villandry or the Tuileries, the allée is as carefully thought out as the planting beds it frames. Gravel gives you that unmistakable combination of formality and softness — crisp geometry from above, a gentle crunch underfoot, and a surface that drains beautifully through a British winter.
For a UK plot, this matters more than you might think. Our heavy clay and frequent rainfall can turn solid paving into a slick, algae-covered hazard, while a gravel path simply lets water pass through. Get the preparation right, and you will have a path that looks elegant for a decade or more. Skimp on the base, and you will be topping it up every spring and cursing every rut.
Choosing the Right Stone
French gardens traditionally use rounded, water-worn stone — what the trade calls pea gravel or, at larger sizes, rounded shingle. It is softer and more sympathetic than angular crushed stone, which has sharp edges and a slightly industrial look.
- Rounded pea gravel (10–14mm): the classic choice for elegant, low-traffic paths. Beautiful, but it moves underfoot and migrates on slopes.
- Rounded shingle (14–20mm): a good middle ground — still soft to look at, slightly more stable, and less likely to be kicked into borders.
- Angular gravel (14–20mm): locks together far better and is the practical choice for slopes, driveways or heavy foot traffic, though it reads as more utilitarian.
Colour sets the mood. Pale honey and cream limestone gives that sunlit Provençal feel; cool grey complements slate and red brick; warm gold works with Cotswold stone. Aim for a stone that sits somewhere between your paving and your planting rather than shouting over both. Buy from a reputable local supplier and order around 10 per cent extra for topping up later — batch colours vary, so getting it all in one go is worth the effort.
Marking Out and Digging the Trench
Start with the line of the path, not the stone. In a French scheme the path usually leads somewhere — a gate, a bench, a focal pot — and the axis matters. Run a string line down the centre and check it against the house or a boundary so the geometry reads true from the kitchen window.
Widths that work in a British garden: 600–750mm for a secondary path between beds, and 900–1200mm for a main route where two people might pass. Anything narrower feels cramped once plants flop over the edge.
Now dig. Excavate to a depth of around 150mm — that is roughly 75–100mm of compacted sub-base, a membrane, and 40–50mm of gravel on top. Give the trench a slight cross-fall of about 1:60 so surface water runs off rather than pooling, and keep the finished level 20–25mm below any adjacent lawn or border so the gravel stays put.
Building a Base That Lasts
This is the stage most people rush, and it is the one that decides whether your path still looks good in five years. Fill the trench with Type 1 MOT sub-base in layers no deeper than 75mm and compact each layer thoroughly with a plate compactor or a heavy hand tamper. Compaction is everything: loose stone will settle unevenly and your beautiful gravel will end up looking like a farm track.
Once the base is firm and level, lay a woven geotextile membrane over the whole trench. It will not stop every weed, but it slows them dramatically and stops your gravel from sinking into the sub-base. Lap the edges by at least 100mm.
Then edge the path. Without a fixed edge, gravel wanders into the lawn within a season. Options that suit a French look include:
- Stone setts or cobbles set in mortar and haunched on the outside — the most authentic and durable choice.
- Clay pavers laid flush or slightly proud, warm and traditional.
- Steel or aluminium edging hidden just below the surface — neat, inexpensive, invisible.
- Clipped box or lavender as a soft edge, best used alongside a hard edge rather than instead of one on a main path.
Laying and Settling the Gravel
Spread the stone with a shovel and rake, working backwards so you are not treading on finished surface. Aim for a consistent 40–50mm depth — deep enough to look generous, shallow enough that feet do not churn it. Use a rake to dress the edges neatly against the setts, then water the path lightly with a fine spray to settle the dust and help the stones knit.
On a flat path, that is genuinely all you need to do. On a slope or where the path takes regular traffic, consider a stabilising grid — a honeycomb mat laid over the base and filled with gravel. It keeps the rounded stone in place and makes the surface far easier to walk on and push a wheelbarrow across.
Keeping It Looking French
A gravel path is not maintenance-free, but it is undemanding. Top up by 10–15mm each spring to replace what has been walked into the house, rake it occasionally to keep the surface even and remove footprints, and pull weeds as they appear rather than letting them seed. A leaf blower in autumn is far kinder than a rake.
Where gravel meets a lawn, keep the edge crisp with a half-moon edger. In a French scheme, that sharp line between stone and green is half the effect. Pair the path with a clipped box hedge, a row of lavender, or a pair of standard bay trees in pots at the threshold, and you will have created something quietly formal — a little corner of France, doing very well in the British rain.


A potager combines vegetables, herbs and flowers in orderly beds. Use low box hedging and gravel paths to bring French elegance to limited space.
Terracotta ages beautifully but can crack in hard frost. Choose frost-resistant clay or move pots under cover during the coldest spells.
Light pruning after flowering keeps lavender compact and prevents woody growth. Avoid cutting into old wood, which may not regrow reliably.
Parterres rely on clear geometry and crisp edges. Plan the pattern on paper first, then mark lines with sand before planting box or yew.